![]()
Time
![]()
Complexity
![]()
Cost
There's more to changing a switch than connecting a few wires. You have to check grounding and box size for a safe, first-class job. It's easy to install a dimmer switch, but make sure to upgrade the wiring if necessary to make it safer and meet Electrical Code requirements. We'll show you how to assure a safe installation.
It doesn’t take long to replace an ordinary light switch with a full-feature dimmer light switch. But while you’re at it, to make your home safer, you should upgrade the wiring to meet the latest requirements of the National Electrical Code. Our step-by-step instructions will show you how to install the dimming switch, concentrating on details that will guarantee a safe installation. Here’s what you can do if your light switch isn’t working.
The tools you’ll need to install a toggle dimmer light switch are inexpensive and will come in handy for all your electrical projects. You’ll need a screwdriver, wire stripper, inexpensive (2 lead wire type) voltage tester and needle-nose pliers to install a dimmer.
Wiring problems and mistakes are all too common, and if left uncorrected have the potential to cause short circuits, shocks and even fires. Here are the top 10 electrical mistakes people make and how to fix what you find.
Pop Paul-Catalin/Shutterstock
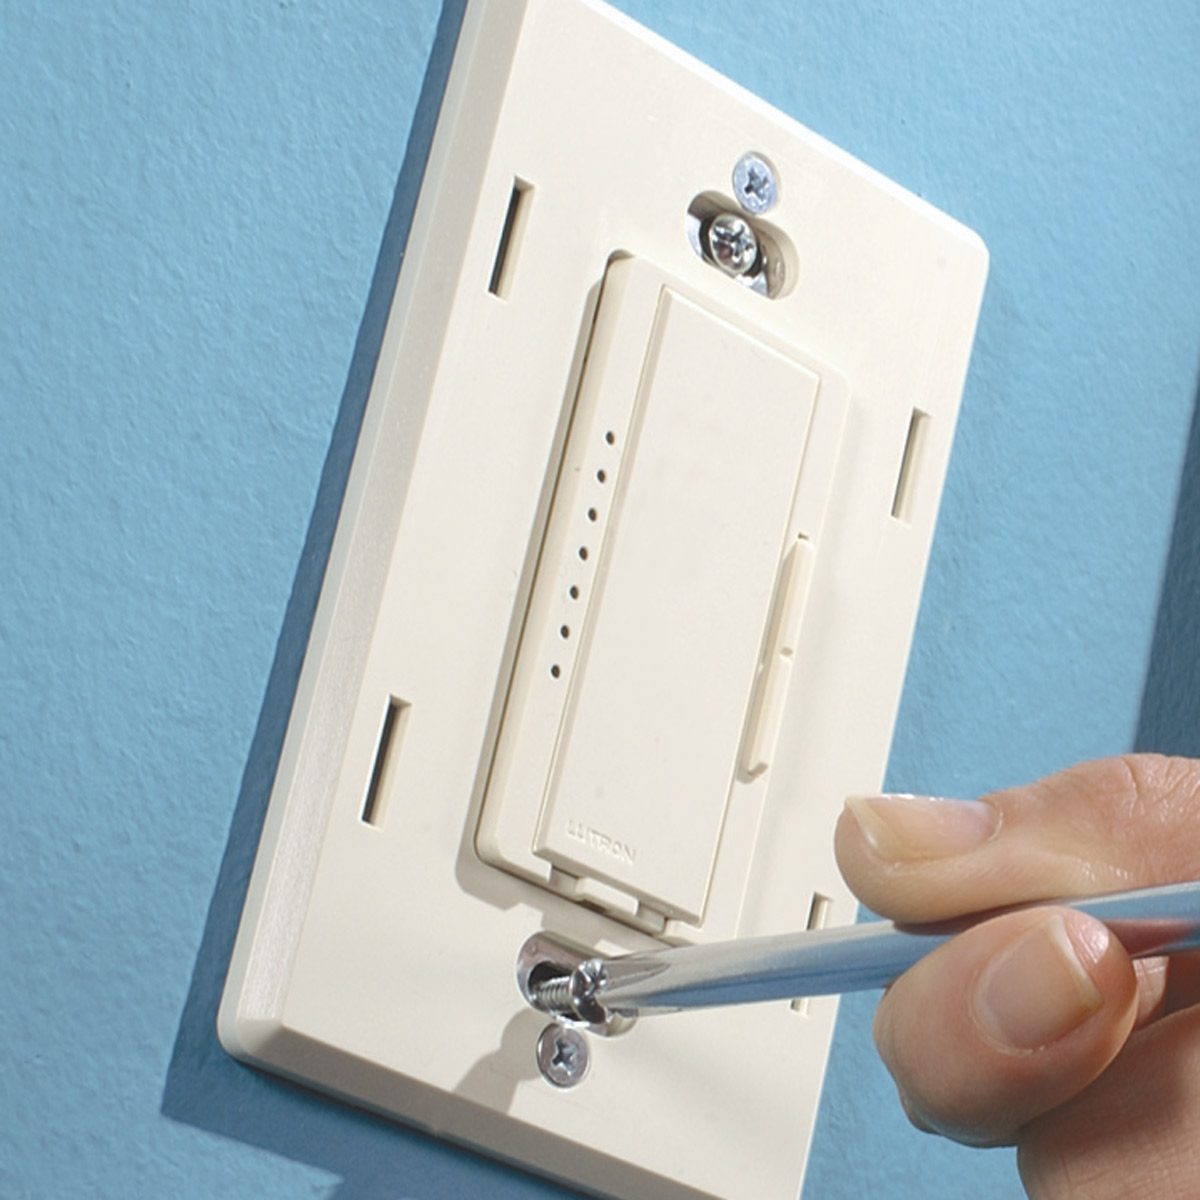
There are several types of dimmer switches out there. We show the single switch but there are also three-way dimmers, CFL and LED dimmer switches.
Family Handyman
To begin, turn off the power and double-check for hot wires in the box. Turn on the light and have a helper watch as you switch off the circuit breakers, or unscrew the fuses one at a time until the light goes out. Leave this circuit turned off while you work.
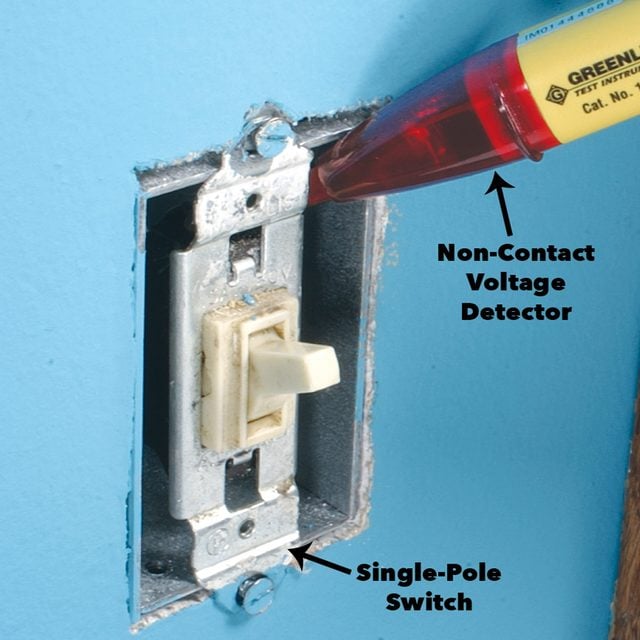
We’re using a non-contact voltage detector to double-check for voltage before removing the dimming switch. We prefer this type of tester because it’ll detect voltage without direct contact with the metal conductor. That’s huge—it means you can check potentially hot wires before you handle them.
Hold the tip of a non-contact voltage detector near each screw terminal to be sure the power is off. After you unscrew the switch and pull it away from the box, probe around inside the box with the detector to make sure there are no other hot wires from another circuit.
Call an electrician if the original switch is connected to two white wires. This may indicate a dangerous switched neutral. Also, if you have aluminum wiring, don’t mess with it! Call in a licensed pro who is certified to work with it. This wiring is dull gray, not the dull orange that’s characteristic of copper.

Family Handyman
Too many wires and devices stuffed into a box can cause dangerous overheating, short-circuiting and fires. The National Electrical Code specifies minimum box sizes to reduce this risk.
To figure the minimum box size required by the electrical code, add 1 for each hot and neutral wire entering the box, 1 for all the ground wires combined, 1 for all the clamps combined, and 2 for each device (switch or receptacle) installed in the box. Multiply this figure by 2 for 14-gauge wire and 2.25 for a 12-gauge wire to get the minimum box volume in cubic inches.
To help determine the gauge of the wire in your switch box, look at the amperage of the circuit breaker or fuse in the main electrical panel. Fifteen-amp circuits are usually wired with 14-gauge wire and 20-amp circuits require 12-gauge or heavier wire.
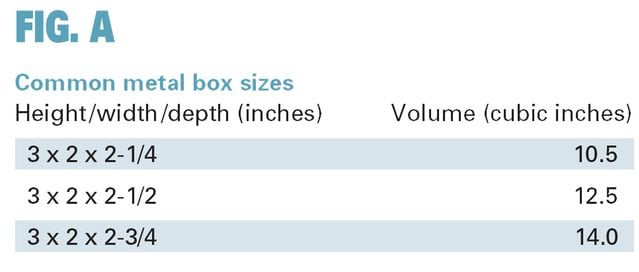
Compare the figure you get with the volume of your existing box. Plastic boxes have the volume stamped inside, usually on the back. Steel box capacities are listed in the electrical code. We’ve listed the volume of the most common steel boxes in the chart above.

Family Handyman
If you have a steel box, measure the height, width and depth of it to determine the box volume and consult the chart to see if it’s large enough. Plastic boxes have their volume stamped inside. If your box is too small, replace it with a larger one. It’s possible to replace a box without cutting away the wall, but it’s a tricky job. We recommend just removing about a 16-in. square of drywall or plaster and patching it after the new large box is installed.
Tip: If the circuit breaker is labeled “15 amp, ” the wires are probably 14-gauge, or 12-gauge for 20-amp circuit breakers.